With podcasts continuing to rise in popularity and more people multi-tasking while listening, starting your podcast NOW is a no-brainer! It’s a great way to connect with your audience, share good content, and make it easy for people to consume.
I have been getting asked a lot recently where someone even starts to set up a podcast; what equipment is needed, where to put the recordings and how to get them on iTunes and Spotify? By the time you’re done reading this, you’ll have a clear game plan and know what to do along with different options from cheap to expensive.
Having set up multiple podcast “set-ups”, launching or helping to launch multiple podcasts and producing a handful of top podcasts; I have some recommendations that I’m happy to share with you! Below I break them down into a few different sections.
As you read, I’ll breakdown the different parts of the podcast, softwares you might need, and go over a bunch of different options for what equipment to use, where to host, etc. Please note, everything I mention will give you very good quality podcasts either way so you can rest assured you’ll have a great set up whatever budget you’re on!
Let’s dive in!
HOSTING
Podcast hosting is simply where the podcast raw files, media, etc, will live and where you will upload to. The hosting company connects to all the listening platforms like Spotify, Apple, etc so you don’t have to go upload to each and every one. I highly recommend you pick one of the following hosting platforms as they’ve been around for a bit and are proven. Yes, there may be some cheaper options, but they are more of a hassle and aren’t as easy to work with; sometimes “cheaper” isn’t always better because you’ll want to get with a hosting company that you can grow with. You do NOT want to be changing hosting companies. All the below recommendations are great and ready for your new podcast and are also “future-proof” as your show grows! In no particular order, I recommend:
- Libsyn I’ve launched multiple shows starting on Libsyn and help manage some that are still on there today! Libsyn continues to grow and add features. They’re super reasonably priced and fairly easy to use. You can create an account with them here: https://www.libsyn.com and can even start for as little as $7.00 a month! From there, you can then increase the features and the size of stuff you’re uploading if needed and you can upgrade on the fly with them. It just depends on how much you’ll be uploading monthly.
- Captivate.FM Captivate is great for beginners and advanced podcasters alike! Simple to use and all of their plans start with a free 30-day trial so you can sign up, create your show, and see how you like the flow of their software. They continue to release new features and have been a solid company for the shows I know who host with them. I highly recommend them!
- Megaphone Not for the beginner podcaster, Megaphone is a super powerful hosting software more geared towards larger shows and networks. Very solid option though as you start to grow and need more robust features and possibly join a network.
There are other options to hosting your podcast and more continue to pop up, however, we haven’t used or looked into many others as our experience with the three above have all been great!
RECORDING SOFTWARE
For all our interviews that aren’t done in person, we recommend using either:
- ZOOM You’ve already got the account so you might as well use it. Pros: everyone knows it. Cons: You get stuck with a raw file and need to download and edit it somewhere, etc. It was NOT made specifically for podcasters.
- Riverside Newer video calls but designed FOR PODCASTING; scheduling, recording, even editing is built in to this platform! I recomend it to everyone who is start their podcasts now!
Either of these will get the job done for interviews with others or just even your solo episodes! We had used others in the past but Zoom is a classic and reliable and Riverside is a newer, more “Podcast dedicated”, recording platform. *I would recommend Riverside if you’re beginning and want ease of use!
Editing Software: You’re going to need to add bumpers, take out screw ups, and even tweak the sound and edit “ums” if you want.
- If you have a Mac, GarageBand is fine for it and will give you great results provided your audio source is good. This does NOT do video, you would need something like Final Cut (more advanced) or iMovie (beginner) for Mac users to do video editing.
- If you are using Riverside mentioned above, you can edit right in the platform! (I would recommend this route especially for beginners or if you’re doing it yourself.)
- You can also use Audacity which is a free download. Again, this is basic Audio Only.
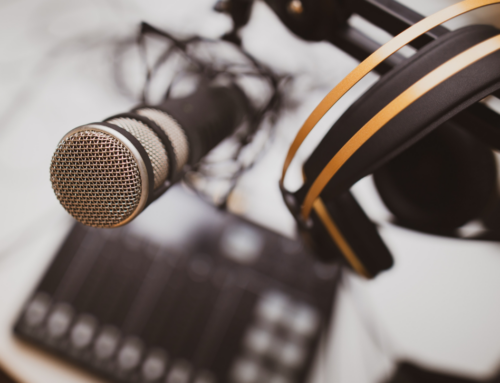
EQUIPMENT
You’ll need a few different pieces of equipment to ensure a quality sounding podcast. I’ll make a couple different recommendations below; all will give you very good sounding episodes.
- Microphones: There are two good USB mics for podcasting that are very reasonably priced and can be used without a soundboard.
- The Blue Yeti Microphone is a pretty good microphone and already has a built-in stand. You may want to also get a pop filter for it, like this Auphonix one.
- A better USB mic option is the Audio Technica ATR2500x USB Microphone or the Audio Technica ATR2100x USB/XLR. You’ll want a desktop stand and a pop filter like this Auphonix one for either one. If you want a great sounding mic that doesn’t break the bank, I always recommend either of these. And, as an added bonus, the ATR2100 can also be used with a mixer board if you so choose. A great mic and a great price!
- Headphones: We have multiple pairs of the Sony MDR7506 Professional Headphones. Super comfy and great sound!
- Audio Interface: I highly recommend the Focusrite Scarlett to go from you XLR Microphone to your Computer. This will make you sound so much “fuller” and is an easy way to have 1 or 2 XLR mics go into your computer
The microphones above are really good and you’ll be happy with any of them if you want to stay on the less expensive side and want to go straight into your computer. Everything above is for an easier setup but still very good quality and would recommend it for most people for ease of use and expense.
If you do want to do a bigger, more professional setup for in-person interviews, here is what’s needed and what I recommend.
Microphone – you can either do the Audio Technica ATR2500 (above) or we use and love the sound of the Heil PR40 Microphone. This is the best pro microphone around. You can either get this package which includes a mic arm and shock mount, or you could buy them separately and get just the Heil microphone, Shock Mount, and Desktop Stand. After using both, we prefer the regular desktop stand. Obviously, one per person so get multiple if needed.
- Headphones – (Same as above) We have multiple pairs of the Sony MDR7506 Professional Headphones. Super comfy and great sound! Get one for each person.
- TWO Participants
(Host and 1 guest) You could go with a mixing board or you could still use the same Focusrite Scarlett above and go into your computer to record.
- MORE Than Two Participants (Host and 2+ guests) You you’ll need a mixing board that will send it all to a recording device. It will give you ample inputs so you can have multiple in-person interviews as well as “level” each other out so the loud person isn’t so loud, etc. There are multiple boards out there but we use all Mackie Mixers at our events and podcasting. This Mackie 10 Channel will give you 4 XLR mic inputs. If you need more, you can use a different cord with the same mixer or buy even larger mixer with more XLR inputs. Yamaha and Pyle also make good mixers that could work for podcasting.
- Recorders – We like the ZOOM H4N or ZOOM H6. These will record externally from your sound mixer board. These are both very versatile recorders and can be used in multiple scenarios.
- You’ll also need a series of cords: Stereo Interconnect Cable, a mic cord should come with your mic in some of the packages, but you can also buy
Monster Mic Cord that will be better cord than most. And a Stereo Breakout Cable to go to your recorder (this is is easiest option if you’re doing a mixer/recorder).
Honestly, we recommend going the simpler USB ATR2500 mic route first and see how it goes. You can always go up from there but you will still get really good sound with the basic setup.
As for your launch, make sure to not hook your podcast up to Apple Podcasts until you are ready to launch to the public. We always recommend having 3 episodes there when you launch and then a couple more “in the bank” to release during that first week or so. This will help with rankings and hopefully get you on the New and Noteworthy! To submit to Apple Podcasts you will go here: https://podcastsconnect.apple.com/ and set it up. You will need to take your Feed from Libsyn (or wherever you’re hosting) and add it to Apple Podcasts through there.
Good luck with your setup and new podcast! It’s a great way to create content for your fans and followers and is a great way to continue to be “in their ear” daily or weekly!